I'll be the first to admit I am terrible at blogging. I'm also a terrible pen pal, and I don't call home nearly often enough, but that's another story. But regarding the sew along, I'm a bit late letting you know. So...
WE ARE HAVING A SEW ALONG!
If you are a member of Facebook, please come JOIN MY GROUP, and if you're so inclined, join in!
We are doing January Sunrise, my new paper pieced pattern that's available in my Pattern Shop. Each month we're doing one set of units. In January, we did the center compass, and we just started month 2, and are doing the inner ring of flying geese.
If you've been debating, join the sew along. It will help keep you motivated to work on it a little each month. And by Christmas, you'll have a completed quilt top!
And I'm going to try to work on being a more consistent blogger. But if you want to hear what I'm working on, you're more likely to hear from me in my group on Facebook!

I am a quilt pattern designer, an independent fabric designer, and a quilter for hire. Life's pretty insane most of the time, and sewing is my sanity! I will be posting my sewing adventures here, including stuff I design, patterns I test, awesome tools I might find, and whatever else might strike me at the time. Check out my quilt patterns, fabric designs, and finished items for sale in my stores, in the tabs right below this text.
Monday, February 17, 2020
Wednesday, October 30, 2019
January Sunrise is available for sale!
The moment you (or maybe just I) have been waiting for...
JANUARY SUNRISE IS AVAILABLE FOR SALE!
From my Shopify item page:

Introducing January Sunrise! This is a foundation pieced quilt pattern for advanced quilters who already know how to paper piece. Included are all the templates you need (printed on easy to tear newsprint) and a 32 page instruction booklet.

Also included is a coloring sheet, so you can try out what colors you would like to use before you buy. Each template includes the template designation, piecing order, and color of each piece.
I started this design in early 2013, but didn't think I had time to actually make it myself. It sat on my hard drive for 5 years before I made the first cut, and almost 2 years later, I'm releasing the pattern for you!
This is NOT a teaching quilt, so you do have to be able to foundation paper piece before you try this. I DO however include a tutorial on piecing with freezer paper, which is my preferred method. So if you're not great at it, but you really want to give it a shot, try the freezer paper method (You can download my tutorial free from the files section of my facebook group HERE.)
THERE ARE NO CURVES OR Y-SEAMS IN THIS PATTERN! It's all straight lines! So it's no more complicated than any other paper pieced project, it's just bigger. You will stitch up blocks before assembling the final top, just like many other quilts.
Get your copy right here!
January Sunrise is finished!
Everyone, I have amazed myself. Truly.
Almost SEVEN YEARS ago, I started a new quilt design. I wanted to design a paper pieced quilt that was intense. That you would look at and just say "WOW"! So, I opened up AutoCAD, and I drew a massive 101" square quilt with so many pieces it boggled my mind. I exported it and colored it a million different ways. I even drew up all the templates to use.
And then I sat on it.
I'd open it up every now and then, tinker with it, toy with the idea of starting. But it always came back to "oh, I don't have time for a project like that." And then I'd forget about it for several more months.
But in 2017, around Christmas or so, I signed up to go to a quilt retreat with the ladies in my old quilt guild. It would be 4 days of uninterrupted sewing time, at any hour of the day or night that I wanted.
I decided to take advantage, and get started.
I went thru the dozens of colored sketches I had, and finally decided to use the color scheme I started with! I always seem to gravitate toward blues. It's one of my favorite colors to sew with.

In January, before the retreat, I went to a couple guild sewing days, and I started with some of the center sections. I got done with a few pieces, and I was happy with how well I was able to reteach myself how to paper piece. (I always mess up a few times when I first get going.) I actually got done with almost half of the center, and was pretty impressed with my progress!


February rolled around, and I went on the retreat. It was GLORIOUS. I could sleep in, stay up late, wear my pajamas all day, and just SEW. I barely left my machine for 3 days, from about 8:30 am till after midnight a couple times. And I couldn't believe how fast it was coming together.


By the time I got home, I had almost the entire medallion finished. I just needed to do the lone star triangles. I had never done them before, so, as is my fashion, I drew them in AutoCAD to figure out the best way to assemble them. And, while they aren't all perfect, they came out really well!


So now the entire center medallion was done! And it's only March!
But my teenage son had two trips scheduled in 2019, so some fundraising was necessary. I set this aside to focus on some crafts to sell to help send him on these trips. He better appreciate it! (Turns out he really did, but that's another story for a different day!)
I still worked on it a little, here and there, working on the fabric quantities, occasionally bringing the project bag into work to sew on it a bit at lunch (on the featherweight I keep in my desk drawer!)
So the trips are pretty much paid for at this point, and I don't have any need to fundraise. I started working on it more often, setting up in the conference room at my office over lunch. People would sometimes pop in to chat and see what I was doing.
And I got to a point where all I had left were large completed units to sew together. So one day, I started sewing those together in a conference room over a lunch hour.

And I continued doing that a day or two a week for a couple weeks.


And one weekend, I couldn't take it anymore. I sat down on Saturday, and knocked out HALF the quilt.


And on Sunday?
Oh my goodness you guys. On Sunday...I FINISHED IT.

And I sat and stared at it for about half an hour.
I could not believe I had done it.
But it was still far from finished. I still had to add the border...

And send it out to be quilted (because my quilting is mediocre at best, and I was not going to ruin that many hours of piecing with less than awesome quilting!)

And finally, all that was left was the binding. I spent a few more lunch hours working in the conference room!

Oh my goodness, it's done! DONE!
But then again, I was only just beginning. I had a whole pattern to write. So I got writing.
And when I thought I was done, I got a group of testers together, who all did a phenomenal job on their own quilts!


5 drafts and lots of research on printing later....
And it's Done. DONE DONE DONE. I have nothing else to do on it.
I can't believe it's done!

Did I mention it's done?
You can get your copy by clicking the Add to Cart button at the right side of the page, near the top!
Also, a few weeks ago, I had my finished quilt entered in the Michigan Fiber Arts and Quilters Convention quilt show in Port Huron, MI. And I was told I just barely missed 3rd place. But I'll take almost 3rd out of 70 in my category! I got some great feedback from those that came by (it was kind of cool to be a fly on the wall that way!)

Almost SEVEN YEARS ago, I started a new quilt design. I wanted to design a paper pieced quilt that was intense. That you would look at and just say "WOW"! So, I opened up AutoCAD, and I drew a massive 101" square quilt with so many pieces it boggled my mind. I exported it and colored it a million different ways. I even drew up all the templates to use.
And then I sat on it.
I'd open it up every now and then, tinker with it, toy with the idea of starting. But it always came back to "oh, I don't have time for a project like that." And then I'd forget about it for several more months.
But in 2017, around Christmas or so, I signed up to go to a quilt retreat with the ladies in my old quilt guild. It would be 4 days of uninterrupted sewing time, at any hour of the day or night that I wanted.
I decided to take advantage, and get started.
I went thru the dozens of colored sketches I had, and finally decided to use the color scheme I started with! I always seem to gravitate toward blues. It's one of my favorite colors to sew with.


February rolled around, and I went on the retreat. It was GLORIOUS. I could sleep in, stay up late, wear my pajamas all day, and just SEW. I barely left my machine for 3 days, from about 8:30 am till after midnight a couple times. And I couldn't believe how fast it was coming together.


By the time I got home, I had almost the entire medallion finished. I just needed to do the lone star triangles. I had never done them before, so, as is my fashion, I drew them in AutoCAD to figure out the best way to assemble them. And, while they aren't all perfect, they came out really well!


So now the entire center medallion was done! And it's only March!
But my teenage son had two trips scheduled in 2019, so some fundraising was necessary. I set this aside to focus on some crafts to sell to help send him on these trips. He better appreciate it! (Turns out he really did, but that's another story for a different day!)
I still worked on it a little, here and there, working on the fabric quantities, occasionally bringing the project bag into work to sew on it a bit at lunch (on the featherweight I keep in my desk drawer!)
So the trips are pretty much paid for at this point, and I don't have any need to fundraise. I started working on it more often, setting up in the conference room at my office over lunch. People would sometimes pop in to chat and see what I was doing.
And I got to a point where all I had left were large completed units to sew together. So one day, I started sewing those together in a conference room over a lunch hour.

And I continued doing that a day or two a week for a couple weeks.


And one weekend, I couldn't take it anymore. I sat down on Saturday, and knocked out HALF the quilt.


And on Sunday?
Oh my goodness you guys. On Sunday...I FINISHED IT.

And I sat and stared at it for about half an hour.
I could not believe I had done it.
But it was still far from finished. I still had to add the border...

And send it out to be quilted (because my quilting is mediocre at best, and I was not going to ruin that many hours of piecing with less than awesome quilting!)

And finally, all that was left was the binding. I spent a few more lunch hours working in the conference room!

Oh my goodness, it's done! DONE!
But then again, I was only just beginning. I had a whole pattern to write. So I got writing.
And when I thought I was done, I got a group of testers together, who all did a phenomenal job on their own quilts!


5 drafts and lots of research on printing later....
And it's Done. DONE DONE DONE. I have nothing else to do on it.
I can't believe it's done!

Did I mention it's done?
You can get your copy by clicking the Add to Cart button at the right side of the page, near the top!
Also, a few weeks ago, I had my finished quilt entered in the Michigan Fiber Arts and Quilters Convention quilt show in Port Huron, MI. And I was told I just barely missed 3rd place. But I'll take almost 3rd out of 70 in my category! I got some great feedback from those that came by (it was kind of cool to be a fly on the wall that way!)

Tuesday, January 23, 2018
Working on a new pattern!
It's been far too long since I have sewn on a new design of my own. Between work and kids and just daily life, I haven't really been feeling it! But I've been sitting on a design for about 5 years, and it's been screaming to get out lately. So I finally picked colors and got started this weekend. MUCH more to come, but at least it's started. What do you think of this? I'm pretty happy with it so far. Only 97 more paper pieced sections to go! More photos to come as I get more done. Follow along in my Facebook Group!
What was I thinking?

What was I thinking?

Sunday, January 7, 2018
Pattern Test - Bellavista Top by Itch to Stitch
Here's another winner from Itch to Stitch! I absolutely love everything I've ever made from this company, and I always look forward to new patterns. The latest is the Bellavista top.

This top has options for long sleeves or 3/4 length bell sleeves, and either a scoop neck or a cowl neck. Some of the tops I have seen others make out of big thick sweater knits make me jealous! I don't have anything that thick, but it came out beautifully with a lighter sweater knit, which is pretty common to see in my stash. I love how it came out!

I made the long sleeve and cowl neck options. It took less than 5 hours from constructing the pattern to putting in the last stitch, which is impressive! And now that I have the pattern already assembled and I've made it before, it will go even faster next time. This pattern is written extremely well, as are all Itch to Stitch patterns, so whether you have experience with this pattern line or not, you shouldn't have any trouble putting one or twelve together for yourself.
I have big plans for this pattern, in my tiny bit of free time.

The fabric I used for this sweater came from a color palette mystery box from Sincerely Rylee.
Yes, that's snow on the ground. I immediately put my coat on after these photos were taken!!
I made the long sleeve and cowl neck options. It took less than 5 hours from constructing the pattern to putting in the last stitch, which is impressive! And now that I have the pattern already assembled and I've made it before, it will go even faster next time. This pattern is written extremely well, as are all Itch to Stitch patterns, so whether you have experience with this pattern line or not, you shouldn't have any trouble putting one or twelve together for yourself.
I have big plans for this pattern, in my tiny bit of free time.
It's on sale right now, so get over there and grab your copy! You'll love how this top fits into your wardrobe!
The fabric I used for this sweater came from a color palette mystery box from Sincerely Rylee.
Yes, that's snow on the ground. I immediately put my coat on after these photos were taken!!
Monday, September 11, 2017
Pattern Test - North Point Trousers by Itch to Stitch
I was recently picked to test the pattern for the new North Point Trousers from Itch to Stitch. I have to say, if you're looking to make some amazing pants for yourself, look no further! The pattern is still on sale for a couple more days, so don't miss it.

While I can't promise the same for everyone, these fit me with no pattern modifications, which never happens for this curvy gal. They're my most comfortable pants, and have quickly become my favorite!
And don't be scared of the zip fly, the instructions in this pattern are amazing! This is my second zip fly ever, and it went in perfectly, it wasn't even hard! Here it is, complete with a little cat hair, before I put the waistband on. I love the contrasting stitching! I used it so if I had to rip something out, I could see the thread. But it went together so well, and I love how it turned out!


This was also my first time making welt pockets, which I found to be more difficult. While they aren't perfect, they're better than I thought they would be, given that I'd never done them before!


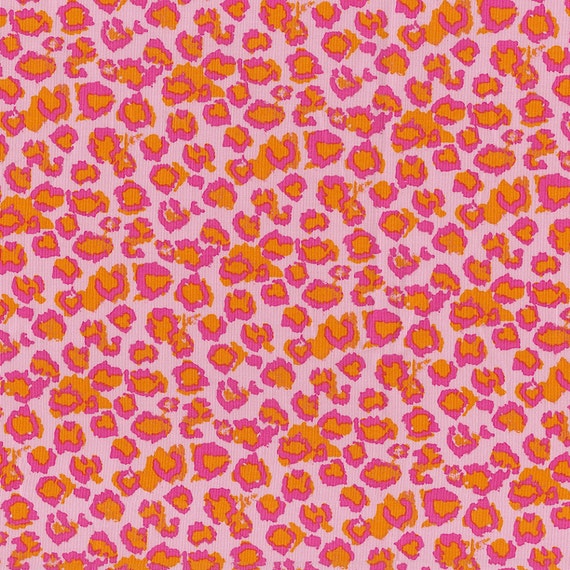
The front pockets are amazing. Because of how these trousers are constructed, they lay flat no matter what. There's no weird wrinkled up bulges after moving around all day. I made my pockets out of this really great hot pink leopard print fabric that's a lot of fun!
Don't miss the sale! It's on sale thru Tuesday for 20% off.
Wednesday, August 9, 2017
Eastern Michigan State Fair 2017
One of the biggest obstacles I have to getting anything done is TIME. There's only so much time to do the plethora of projects I want to do, and my job sure cuts into that time!
This year, I set myself a goal to finish a quilt in time for the Eastern Michigan State Fair. Registration ended in June, so I went ahead and spend the $15 to register, effectively giving myself a deadline. And it worked! I actually entered 7 items (though I only actually brought 6).
First, I finally finished this!


This is a modified Sitting Dragon from Sew Desu Ne?, with parts borrowed from the Jackalope pattern from the same designer, and some pieces I drew up and added. (This designer now has a really adorable FREE Night Fury pattern that you should really get!)
Next, I entered this bag I sewed up from the Everyday Attache pattern from StudioKat Designs.


This was one of the most intensely complicated bags I've ever made, but it went together so smoothly! It's a little smaller than I would carry regularly though, I'm more of a Wrapsody girl.
I also entered 3 photos I took on our family vacation this year.
So how did I do? Pretty well!


This year, I set myself a goal to finish a quilt in time for the Eastern Michigan State Fair. Registration ended in June, so I went ahead and spend the $15 to register, effectively giving myself a deadline. And it worked! I actually entered 7 items (though I only actually brought 6).
First, I finally finished this!

Most people that have seen this have said WOW! And wow is right. This just hits you right in the eye. Photos truly don't do this justice, though this photo is better at capturing the colors than my cell phone was. You can't help but follow the colors, spinning your eyes around with the changes. There are over 200 fabrics in this quilt, so every time you look at it, you see something new!
Next, I finished my Toothless!
This is a modified Sitting Dragon from Sew Desu Ne?, with parts borrowed from the Jackalope pattern from the same designer, and some pieces I drew up and added. (This designer now has a really adorable FREE Night Fury pattern that you should really get!)
Next, I entered this bag I sewed up from the Everyday Attache pattern from StudioKat Designs.


This was one of the most intensely complicated bags I've ever made, but it went together so smoothly! It's a little smaller than I would carry regularly though, I'm more of a Wrapsody girl.
I also entered 3 photos I took on our family vacation this year.
So how did I do? Pretty well!

Best in Show!

Blue ribbons on Toothless and my Everyday Attache!

And a blue for my dolphin photo (top right), a red for my marine landscape photo (lower left), and a white for the photo of my boys while snuba diving (upper left).
Not too bad for the first time I ever entered! I'm going to try a different fair next year though. I have several more quilts to finish, so I'm going to check the open book this year and see what categories there are, and what projects I can finish for those categories. This won't be my last fair!
Monday, August 7, 2017
Pattern Test - Chai Shirt and Dress by Itch to Stitch
This week, I had the pleasure of testing a new pattern from Itch to Stitch, the Chai Shirt and Dress. And let me just tell you, this has got to be the cutest shirt I have ever made for myself! I have plans to make at least four more, and at least one will be a dress. I LOVE the shape and fit of it, it's super feminine. Even my husband likes it! I can't say enough good things about it! And it went together relatively quickly and smoothly (except for a couple finickey buttonholes, but I worked it out.)

This pattern is fit not only in the usual bust, waist and hips, but also for cup size. I had never done a pattern with cups taken into consideration, and I am so happy I tried this!

I had to shorten the bodice slightly (one inch), and graded to fit, but no real major adjustments. I do recommend doing a muslin for fit though, I did two before I stitched this one up.
There are buttonholes and buttons, a collar, seam trimming and grading (there's a tutorial linked if you don't know how to do this), hand stitching OR stitch in the ditch (your choice), darts, and gathers. I definitely wouldn't call this a beginner pattern, it's more like intermediate.


You can get this pattern for yourself HERE, and you should because you'll look amazing in it!
📷 by Logan Maciejewski.

This pattern is fit not only in the usual bust, waist and hips, but also for cup size. I had never done a pattern with cups taken into consideration, and I am so happy I tried this!

I had to shorten the bodice slightly (one inch), and graded to fit, but no real major adjustments. I do recommend doing a muslin for fit though, I did two before I stitched this one up.
There are buttonholes and buttons, a collar, seam trimming and grading (there's a tutorial linked if you don't know how to do this), hand stitching OR stitch in the ditch (your choice), darts, and gathers. I definitely wouldn't call this a beginner pattern, it's more like intermediate.

And how great is this collar? I have made a couple collared shirts before, but they never turn out this good! The instructions are very clear and well written, so you can sew up a professional looking collar.

You can get this pattern for yourself HERE, and you should because you'll look amazing in it!
📷 by Logan Maciejewski.
Subscribe to:
Posts (Atom)